Imbolc decorations are traditionally made from Wheat, long Grasses or straw.
But if you can't find those materials why not try these! They're adaptable to straw and other natural or man made materials too.

Silk Bridget cross.
Here is a quick photo step by step of how i made a Bridget cross using embroidery silk (floss). It took a few tries to get things correct myself but hopefully these instructions for you make sense.
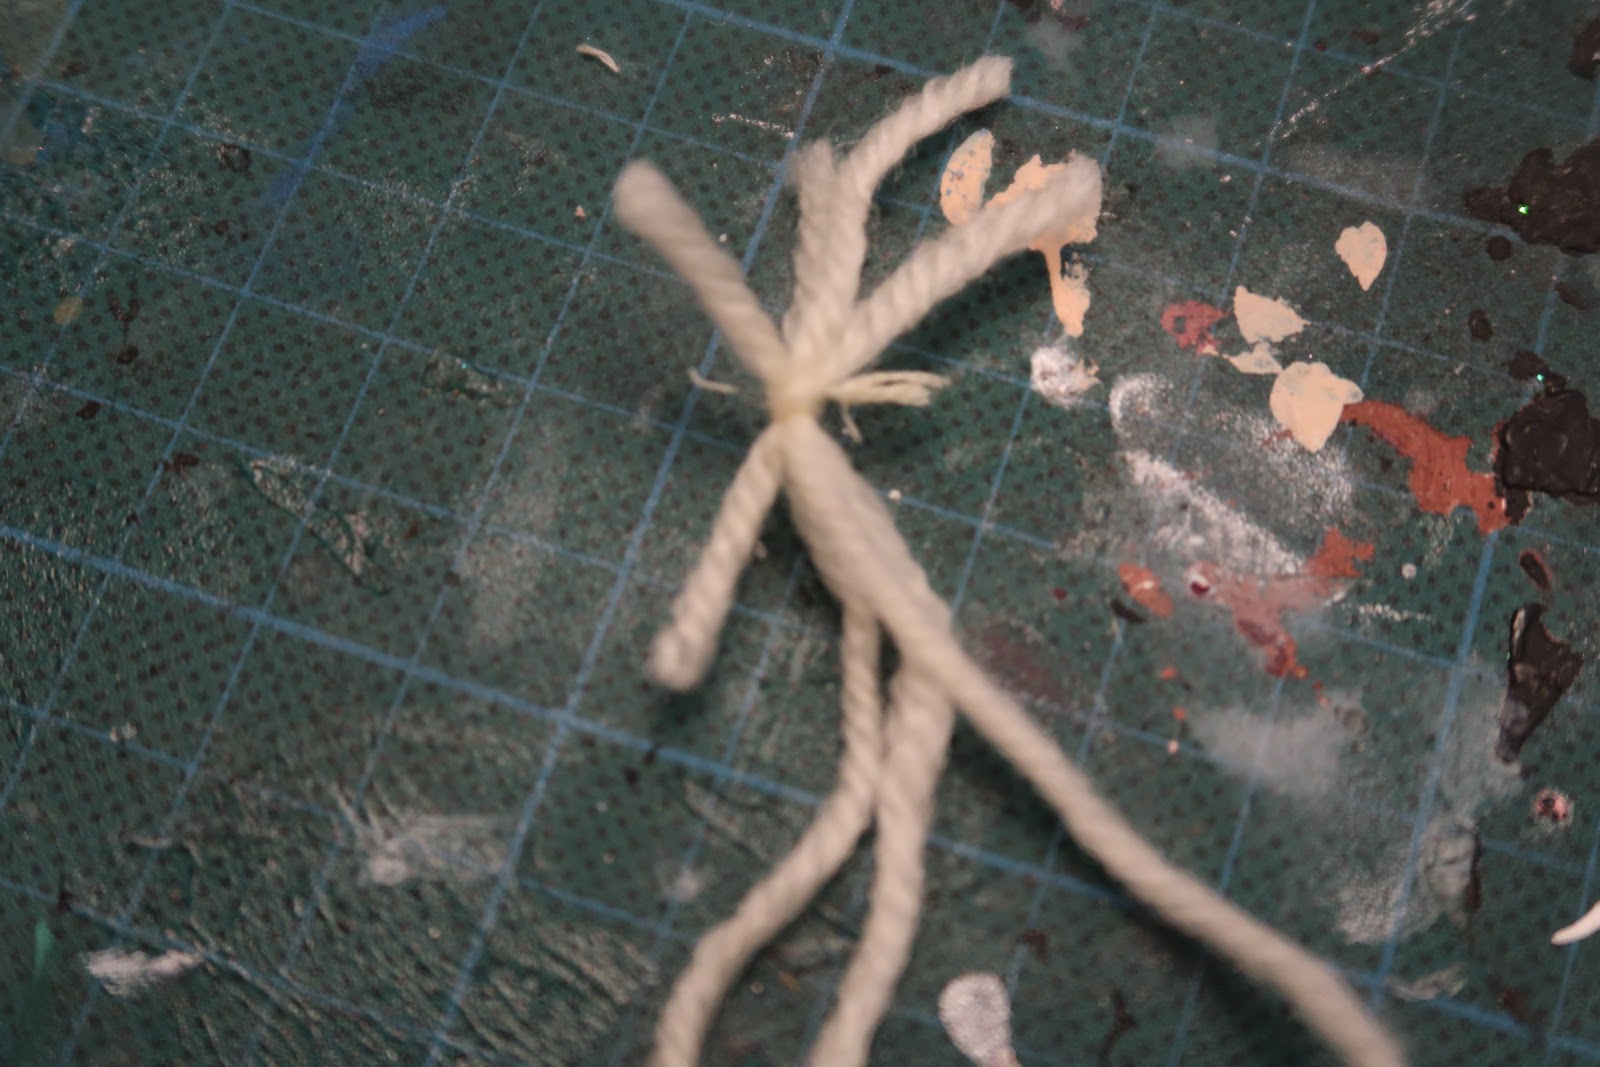
 1. Create multiple groupings of embroidery silk strands. you will need four groups with 4 strands of embroidery silk. You don't need to split these strands like you would for embroidery.
 2. Grab one group and fold it to create a loop. The curve of the loop i will be calling the the hook and the ends will be called the tail. You will want to do this step for all groups.
3. Grab one loop and thread it's tail ends into the hook of another group's loop, then repeat until all four loops look like they are chasing each other in a square shape.

But if you can't find those materials why not try these! They're adaptable to straw and other natural or man made materials too.

Silk Bridget cross.
Here is a quick photo step by step of how i made a Bridget cross using embroidery silk (floss). It took a few tries to get things correct myself but hopefully these instructions for you make sense.
 1. Create multiple groupings of embroidery silk strands. you will need four groups with 4 strands of embroidery silk. You don't need to split these strands like you would for embroidery.
3. Grab one loop and thread it's tail ends into the hook of another group's loop, then repeat until all four loops look like they are chasing each other in a square shape.

 4. Grab the left two group's tail ends in your left hand and the two right group's tail ends in your right hand- Gently pull. You'll find the hook's of all the loops travel to the centre and join up into this cross effect.
5. once your cross is complete and moderately tight. You will have to tie your group tail ends off. I used a contrasting bit of embroidery silk for mine ; but you can just simply knot it if you wish.


6. Trim your tail ends after the tied part so that your cross looks neat and tidy.

Wool Bridget Doll
Making a Bridget doll is fairly easy, But you may find the instructions a little difficult to understand. That's why i have my trustee pictures to help demonstrate. I used quite thin yarn but it's better for you to use a thicker yarn. I've done the measurement estimations for this doll in inches for ease of use.
This is just a simple doll and like the Silk Bridget cross can be adapted to Straw, lase, fabric strips and even ... strawberry laces ( a confectionery delight i might add) just in case you wanted to make some edible ornaments.
Now to begin.

 2. Tie with another piece of wool in the centre of your bundle.
3. Next fold along where you tied the bundle so that the tail ends of your wool run down towards the ground but the tied part remains flat. It should look a bit like the top of a head of hair.
4. Take your hand and bundle the wool to that you create a ball shape then tie beneath. You may have to smooth out the wool and re position it a few times before tying it. Make sure you tie the not tightly and twice for extra security before trimming the edges of the tying string off


5. About 1-2 " below where you tied, tie again to create the body part of the doll.
6. Cut 3-9 more pieces of string depending how Small your doll is- the minimum length for this should be 10" but you can choose the length if you wish . It's better to go a bit longer as you can cut to make the arms smaller. It's also best to pick an amount of strands that can be divided by three as you will be doing a three way plait of the wool ( so you'll want to split your wool into three equal groups to plait). Tie one end of your yarn ends to make it easier to plait.
7. Plait the wool until you have one long braid and then tie the ends off 1/4 " away from the ends.
 |
| How to plait step 1 |
 |
| How to plait step 2 |
 |
| How to plait step 3 |
 |
| Completed braid with ends tied |

 8. Push one end of your braid through the body part of the doll that you made when tying in instruction five. Once completed you now have your basic doll which you can decorate with different coloured yarn or Wicca charms.
I decided to give my Bridget doll a coronet made of purple embroidery silk and braided red thin yarn to create a criss-cross shaped body decoration but you can decorate yours any way you like and can even add hair or give it features. You can even choose a different colour or thickness yarn if you wish.
No comments:
Post a Comment